Thursday, December 24, 2015

How to Wrap Presents

Growing up, most gifts were wrapped in boxes with wrapping paper. Then, came along gift bags making gift wrapping much easier. But, I've always felt like gift bags aren't as fun to open as a traditionally wrapped present, so I spend hours wrapping presents for our family, and it is well worth it! It's also somewhat therapeutic for me- I get in a zone, maybe listen to music or have a drink (non- alcoholic of course for younger readers)- make it fun!

You will need: tape, scissors, wrapping paper, tissue paper, gift labels, bows, and gift boxes.

First, I set up the box:

Open up the box.

Set up the tissue paper and press down around sides.
Next, place your gift inside and fold the tissue paper around your gift:

Make sure you have the right size box. As you can see, this shirt fits perfectly in this box.

For this shirt, I folded the top and bottom of the tissue paper first.

Then, I folded the sides.

And, I tape in the middle to keep it in place.
Place the top of the box on and tape the sides.
Now, it's time to do the wrapping paper!

This is the wrapping paper I chose to use. I set it out and unrolled some of it.

Place your gift on the wrapping paper once you have rolled some out. Pull the other side to make sure you will have enough to cover your gift, then cut. Cutting the paper straight can be tricky, you can use a ruler or try to buy paper that has lines on the inside to assist with cutting.

Cut the ends off if there is too much extra paper. Extra paper on the ends makes folding the ends very difficult and sloppy. But, don't cut too much because then you will not be able to fold the ends at all.

The amount you leave on the ends varies on the box width, the thicker the box, the more you will need.

Fold the paper over and tape in the middle.

Now, fold the paper down and turn the corners in.

Press down with one hand.

And fold the corner in with the other. Or, use one hand like this. (I would have been using two hands if I wasn't using my other hand to take this picture)

Both ends are folded in.

I folded the end of the paper in like this because it makes it thicker and looks better.

This is what the end will look like when you're done!
Lastly, all you have to do is add a To/From tag and a bow:

I bought these tags at target last year and am still using them. They are super cute and make labeling presents very easy.

Done!


Friday, December 18, 2015

How to Display Holiday Cards


Wonder what to do with all of the wonderful Christmas Cards you've been getting in the mail? Do you not have enough magnets to put them all on the fridge? (me!) Well, here's a solution, hang them on any kind of string with clothespins.
Here's what I used for this project:
First, I attached the command hook where I wanted it on the bookshelf. Then, I cut the trim to the length I needed it and tied it on each end, like so:

Next, I attached the clothespins and the cards!
I will definitely be doing this every year! Looks really cute and festive- much better than them stacked up on each other on the fridge or taped to something.

Now, I have to figure out how to hang the stockings on something like this! (I tried to hang them on here but they are way too heavy for this set up) Stay tuned to see what I decide to do :)

Thursday, December 17, 2015

Chalkboard Mirror

I've had this old mirror, that has been converted into a chalkboard, for years. I used chalkboard paint and simply painted over the mirror. However, I have never really liked the gold frame so here's what I did with it:

Before:
After:
When my boyfriend and I moved into our new house we painted almost the whole house. It's difficult to pick a color. What you see on the color swatch is never the same as what the color looks like on the wall and we have a bunch of leftover paint samples to prove it. The paint samples are great for my crafting though! Here is the paint color I used for this project:
First, I taped the inside of the frame with painters tape.
Next, I started painting. I was not timid with the paint and got a good amount on the brush each time.


I made sure to get all the little crevices because I did not want any of the gold showing through. Once I was done with the first coat, I let it sit and dry over night.


Then, I put on the second coat and let it dry overnight as well. I took off the tape and voila! Transformation.


I may need to touch up a little of the inside with chalkboard paint because I am obviously terrible at taping straight :/ But, I love how it looks now!


Tuesday, December 8, 2015

Holiday Door Decor

How to make a holiday door décor out of things you have. That's what I did today, and I had A LOT of trial and error. I ended up with something that I really like, so it was all worth it!! And, now you will know what to do and what not to do if making something similar.
I started with these materials:
I cut some branches off the bottom of our Christmas tree, and had some leftover ribbon and ornaments after decorating our tree.

First, I got an idea of what to do. I started playing around with the branches and decided on doing a bouquet of branches.

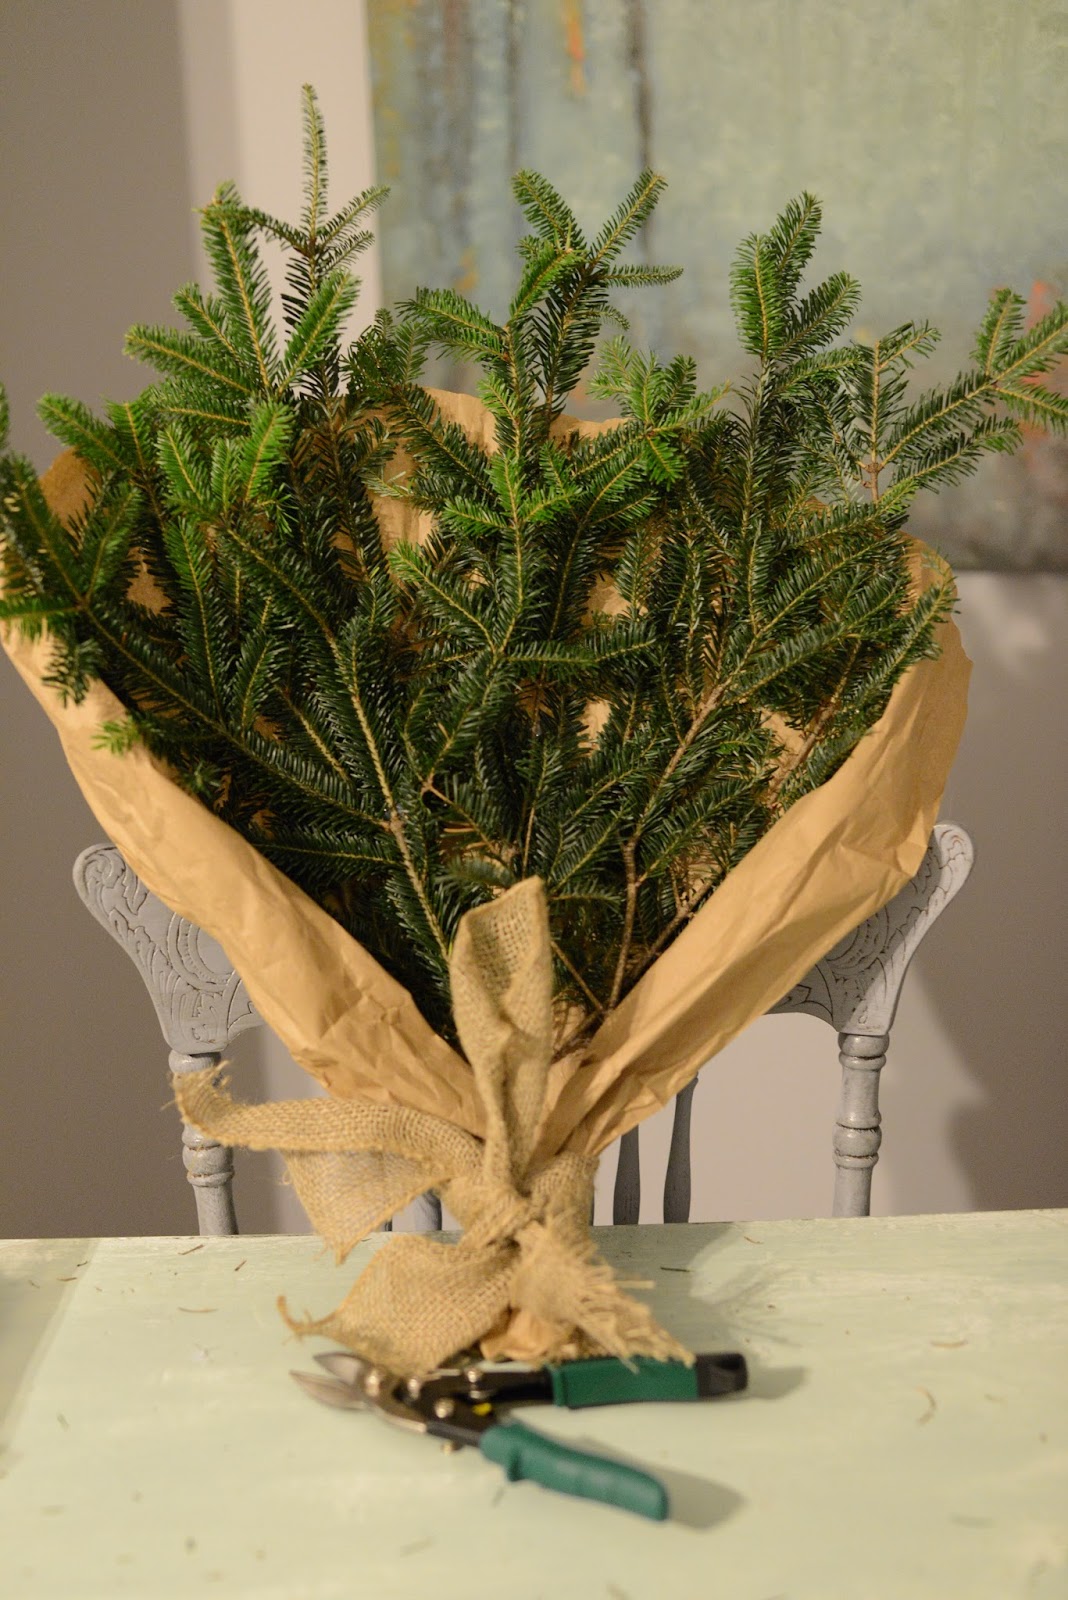
I tied the branches together with some hemp that I had lying around. 

Then, wrapped them with burlap to cover up the hemp. 
I thought it was perfect! I took it up to put on my front door and had some issues. It was extremely top heavy and would not hang right. I tried tying some suede rope I have to the burlap and hang from that.


Unfortunately, that did not work, the whole thing still tilted really far to the front. I tried tying some ribbon to the front of it to counter balance.


I did not like how that looked and it was not very sturdy either. This was the point that I decided it was not going to work like this and I needed to change it completely. I took some time to brainstorm. After thinking about what materials I had, I decided to still do something similar but I needed something to stabilize the branches. I had some packing paper I saved from a recent package.
I thought this would work! So, I super glued the branches to the paper like so:


I kept gluing until it got as full as I wanted it. Then, wrapped the paper around like you would with a bouquet and tied the bottom with burlap. This is what I had: 

 I really liked the look of the brown paper with it!

 I hung it on my front door using a command hook and taped the sides with painters tape (as hanging on the hook was not secure enough) and once again this is what it looks like:

 I'm really happy with how it came out especially after everything that went wrong! I can even hang ornaments on it!