I started working on my vegetable garden last week and can't wait until I have some fresh veggies! I made a raised garden so I could add plenty of good soil to create a really good environment for the plants. Here is how I made it:
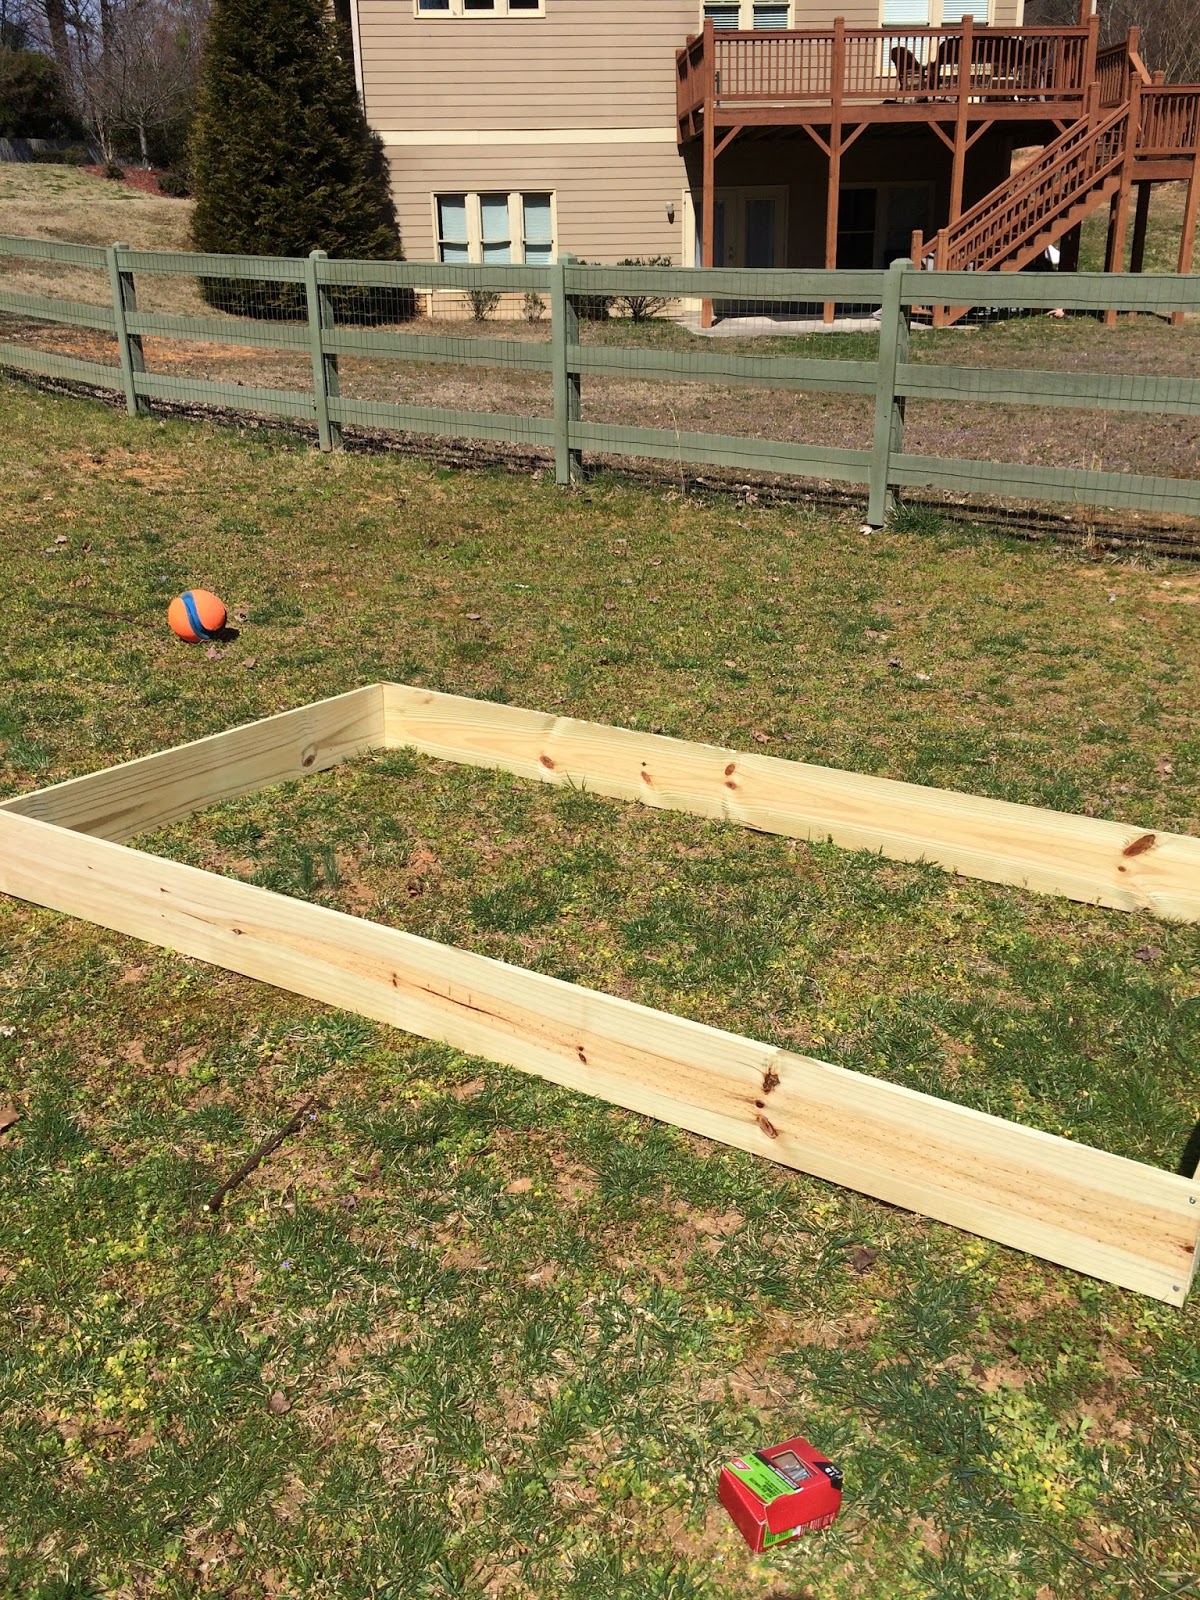
First, I found the spot in my yard that gets the most sun and the most level. I the measured to see how big of a garden I wanted to make. I decided on 8'x4' (the planks I decided on at Home Depot are 8' long so that worked out perfectly) and used 2"x8" planks.
 |
| I took Waylon with me to Home Depot to get the wood. I was so proud of him because he was so well behaved! (which isn't the usual when out in public ) |
 |
| I bought 3 planks and had them cut one in half for me at Home Depot. When I got home, I put them in that spot that I picked out to make sure I still liked it there and to see how I was going to put it together. |
 |
| I picked the boards up and put them together like so. At first I thought I would just hammer some nails in to keep them together. Well, that was not easy to do and probably would've taken me weeks! |
 |
| So, I got my electric screwdriver/drill out to help with the job. |
 |
| I put this screw in half way, then held the other board up to it and screwed it in completely. |
 |
| I anchored with one screw all the way around for drilling and nailing. |
 |
| Which created the frame. |
 |
| I used this drill bit and galvanized nails to secure the planks together. |
 |
| It helps to hold the boards to keep them lined up for drilling. |
 |
| I tried to drill straight through to the other board and to drill enough space for the nails that I had. |
 |
| Then, I just nailed them in. |
 |
| I ended up doing one screw and two nails. That seemed to be enough as it felt pretty solid. I even moved it around a little once I had it built to get it in the right spot. |
 |
| Built! |
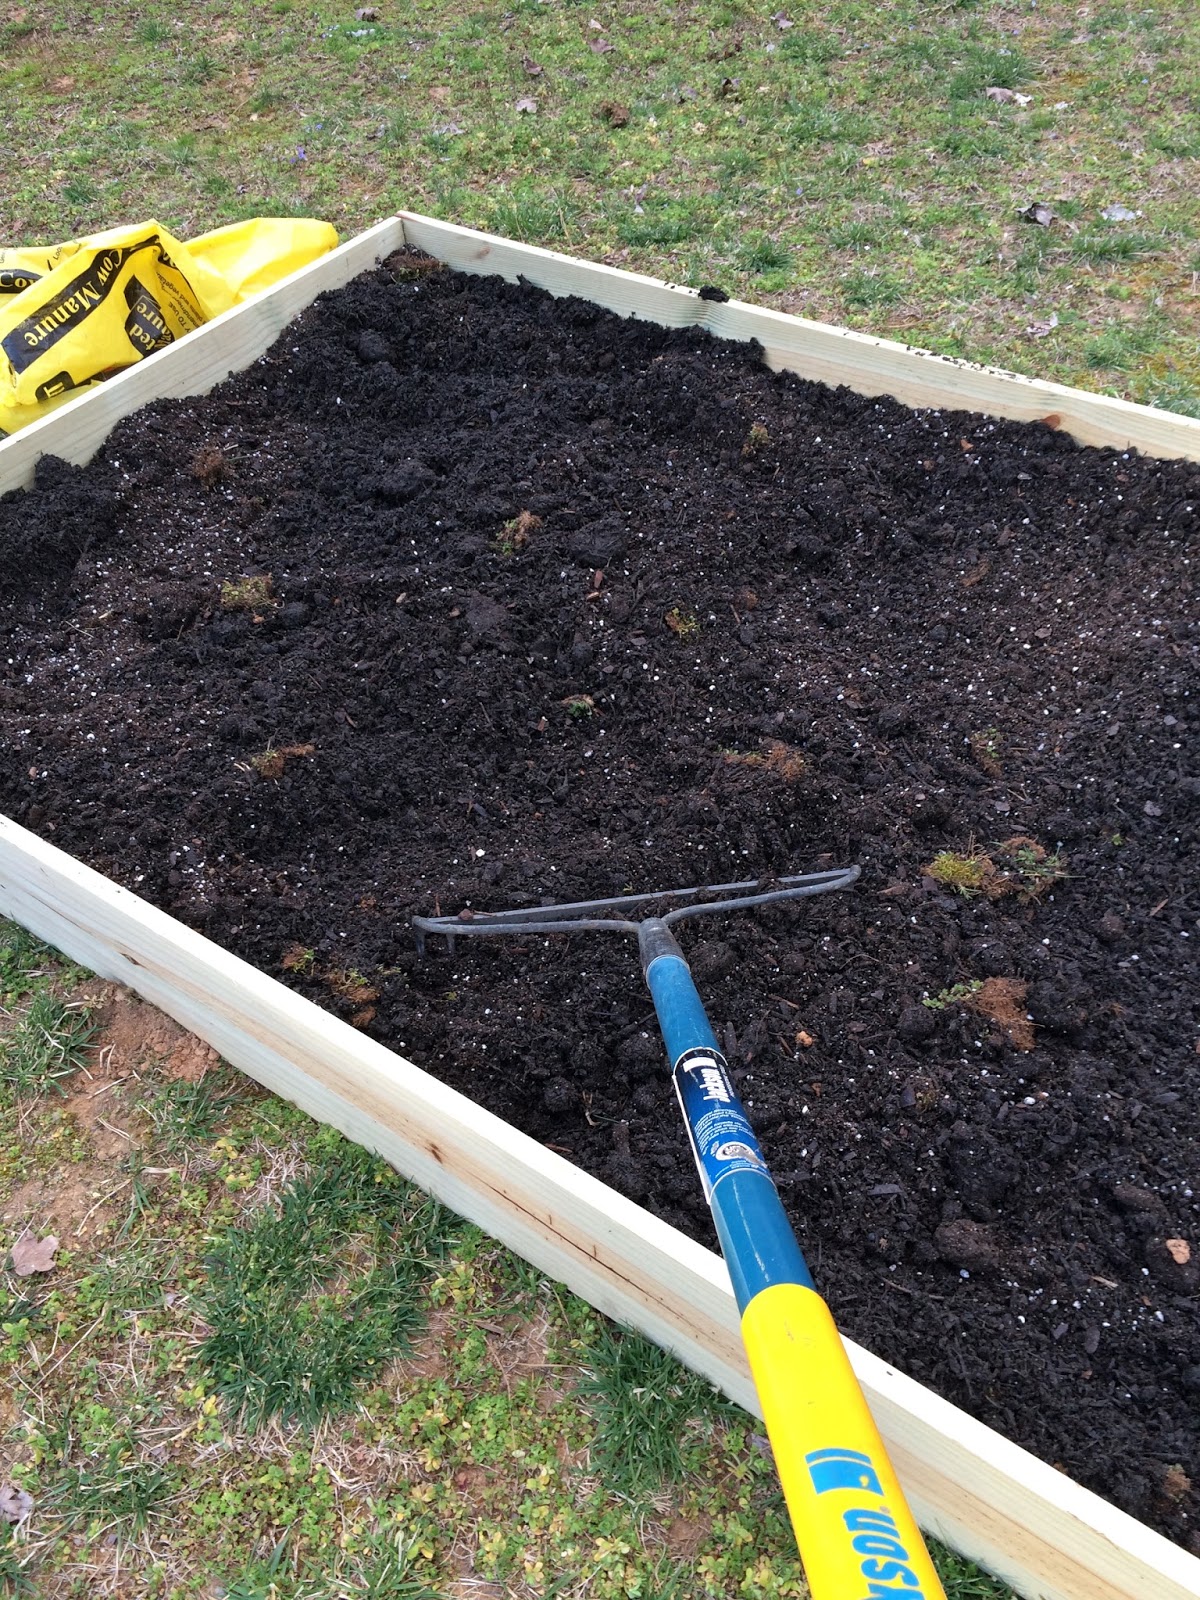
Once I had my perimeter built, it was time for the really hard work- tilling the ground to loosen up the soil and filling the bed with healthy soil, manure, and organic compounds.
 |
| I started in a corner and used my shovel to tear up the grass and soil by turning it in the ground. |
 |
| I was already sweating at this point... |
 |
| But I finished somehow! It took me about 2 hours to till the ground and that included a few water and rest breaks. My arms felt like Jello after this, but I felt good about what I had just done! |
 |
| Now, time for the dirt! I bought all of my soil, etc. at Kelli Green Garden Center- a local place 5 minutes from my house. They were so helpful because I really had no idea what I needed or how much. I ended up going with 3 different ingredients. Five 40 lb. bags of cow manure, 5 40 lb. bags of organic soil, and 2 60 lb. bags of a soil/compound mixture. |
 |
| This is the soil/compound mixture which is used by Kelli Green themselves on all of their plants. |
 |
| I started filling the bed with the manure first. |
 |
| And used 2.5 bags for the bottom layer. |
 |
| Next, I added the organic soil- 2.5 bags of this also. |
 |
| For the third layer, I used one bag of the Sungro. |
 |
| This is what it looked like after the first 3 layers. |
 |
| After each layer, I used the rake to mix it up and even it out. |
 |
| I did the same thing over again. |
 |
| Finished project! (Minus the 2nd bag of Sungro- I waited to add that because I wanted to see how the soil went down after watering) I have since added that bag and filled the bed to the rim. I have also planted a few vegetable plants in it and started some seeds as well! I'll post some pictures of those soon :) Please comment below if you have any questions or advice about vegetable gardening! |


No comments:
Post a Comment